For a basic introduction to HTTP record and replay with examples have a look at Record and replay HTTP requests and responses to create API mocks.
First, go to HTTP in the top navigation bar and then click Export.

Click the button to download a ZIP file that contains all of the HTTP mappings in the WireMock 2.x format.
You can also export programmatically using the Traffic Parrot Management APIs.
First, go to HTTP in the top navigation bar and then click Import.
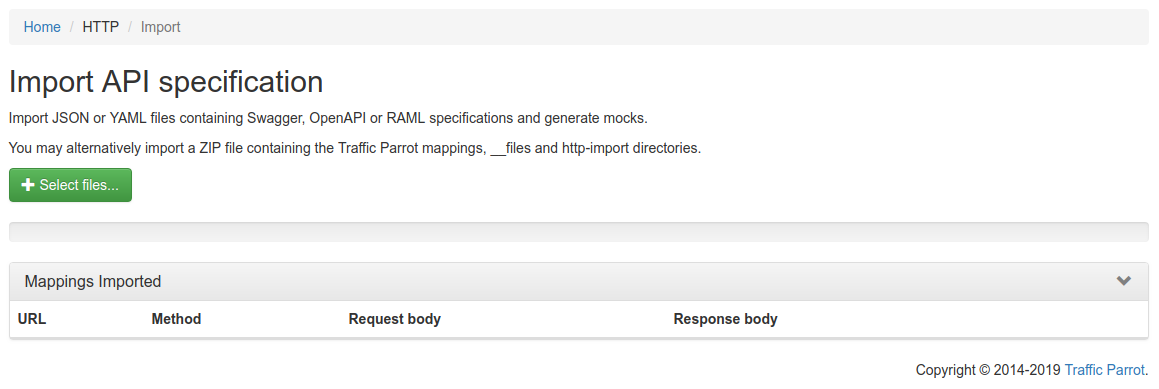
Click the button and select the file(s) to import using the file picker. Traffic Parrot will display the mappings that were successfully imported in the table below.

You can also import programmatically using the Traffic Parrot Management APIs.
When importing from a specification format such as Swagger or OpenAPI, it is possible to use dynamic responses in the example responses in the specification.
Dynamic responses typically result in usage of the {{...}} notation that is not valid JSON or YAML. In these cases, you will need to specify the response as an escaped string when importing from JSON or YAML based formats such as Swagger and OpenAPI.
You can find examples of dynamic OpenAPI responses in the examples project.
First, go to HTTP in the top navigation bar and then click Add/Edit.
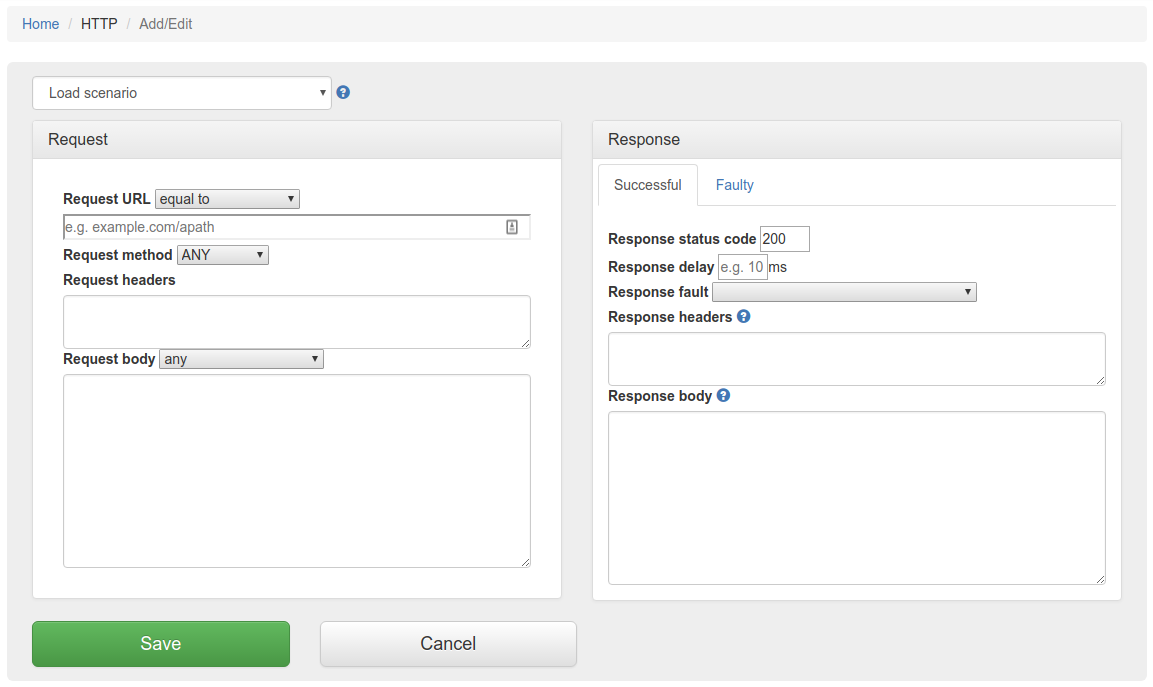
Fill in the Request/Response fields and click Save to configure a mapping.
You can also select from the scenario dropdown which will populate the Request/Response fields for that scenario.
After saving the mapping, it will appear in the list of mappings.

Clicking the edit button  will
allow you to edit an existing mapping.
will
allow you to edit an existing mapping.
In order to edit the list of elements on the scenarios dropdown on the Add/Edit page please open and edit file trafficparrot-x.y.z/scenarios.js and using the samples provided in the file add your new entries and remove the existing ones.
Traffic Parrot helps with SOAP and XML mocking by providing an XML editor, the matchesXMLrequest body matcher and dynamic response helpers such as xPath and xPathList.
Please see the video below for a full demo of recording SOAP requests and responses, and then generating dynamic responses.
Please download Traffic Parrot and the sample UV Index SOAP application and follow the demo in the video below.
If your system requires the use of an outbound HTTP proxy (e.g. in a corporate environment) you will need to make sure Traffic Parrot was started using those proxy settings so that it can correctly record. See the configuration guide HTTP proxy settings.
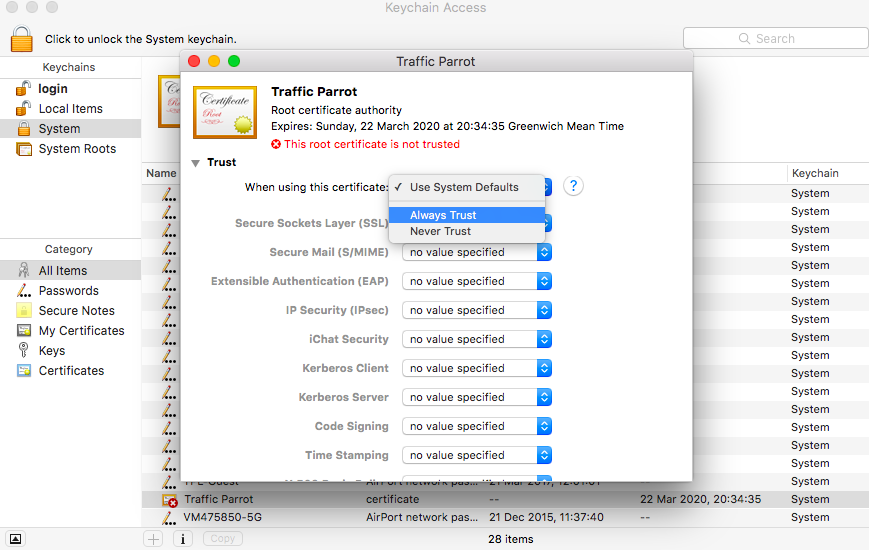
If you need to record a system with a certificate that is not trusted by default, you will need to specify the trust store properties. See the configuration guide Outbound HTTPS certificates.
If you need to record a system that requires a client certificate for authentication, you will need to specify the key store properties. See the configuration guide Outbound HTTPS certificates.
First, navigate to the recording page by clicking HTTP in the top navigation bar and then click Record.
In order to record traffic to a URL, simply enter the Recording URL and click Start recording.

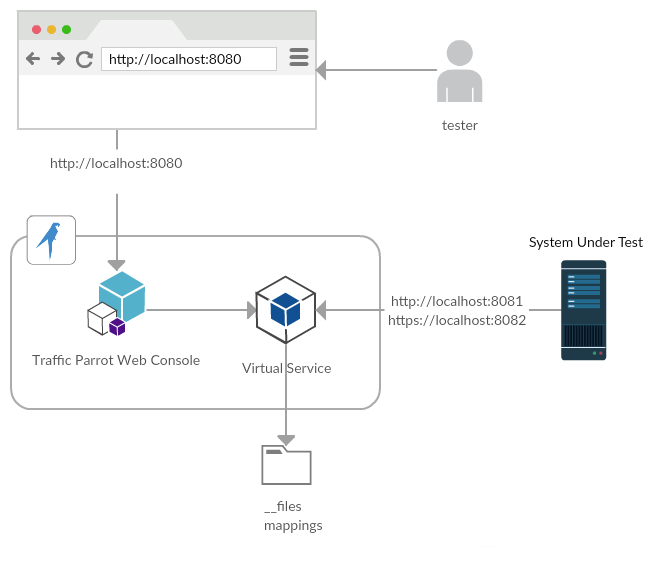
All traffic received by the Traffic Parrot virtual service will be proxied to the host in the Recording URL and recorded as Mappings.
Clicking the edit button will
allow you to edit the recorded mapping.
If the Recording URL includes a path, only traffic to this path will be recorded, however all traffic will still be proxied.
For example, if the Recording URL is set to http://example.com/aSampleResource then only traffic to paths staring with /aSampleResource will be recorded and all other traffic will be proxied to http://example.com.
The Recording URL supports an advanced syntax to allow recording multiple APIs simultaneously. For example:
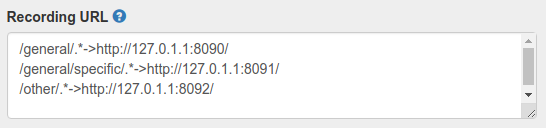
The path is used to determine which API should be used to provide the recorded response. The expression .* is used as a wildcard matcher.
In the example above: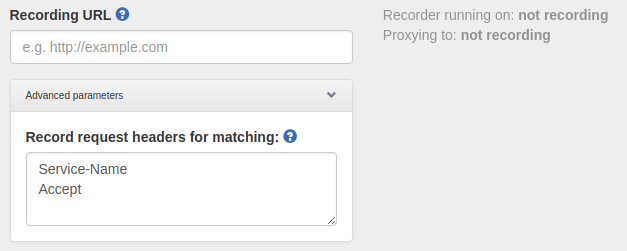
When using Traffic Parrot to virtualize multiple HTTP services at the same time, you may encounter namespace issues if the services have name clashes in the context path.
For example, you may have two services that both have a GET /api/resources endpoint, and one might be hosted at http://service1/api/resources and the other at http://service2/api/resources.
The Traffic Parrot virtual service http://localhost:8081/api/resources would have two mappings associated with it.
There are a number of ways to deal with this situation, one of which is detailed below.
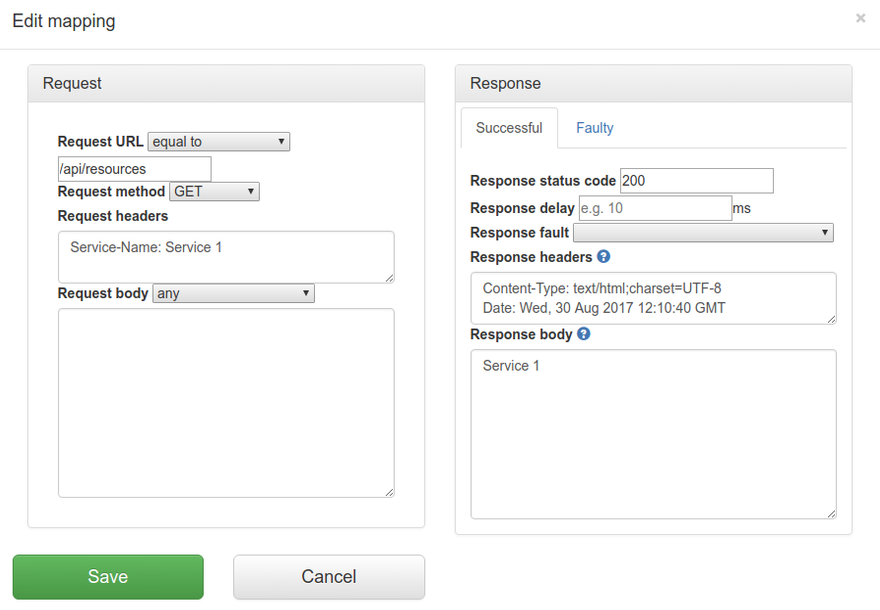
One solution to having the same name resource URL /api/resources for different services is to make a change the system under test and start sending a custom header when communicating with those services. For example, a request to http://service1/api/resources could include a HTTP header Service-Name: service1, and a request to http://service2/api/resources could include a HTTP header Service-Name: service2. That way the HTTP requests are different and Traffic Parrot can map them to different responses.
If you would like to capture those headers during a recording, you need to tell Traffic Parrot to record those headers.
You can also add those headers manually by editing the mapping.
This documentation is for an old version of Traffic Parrot. There is a more recent Traffic Parrot version available for download at trafficparrot.com