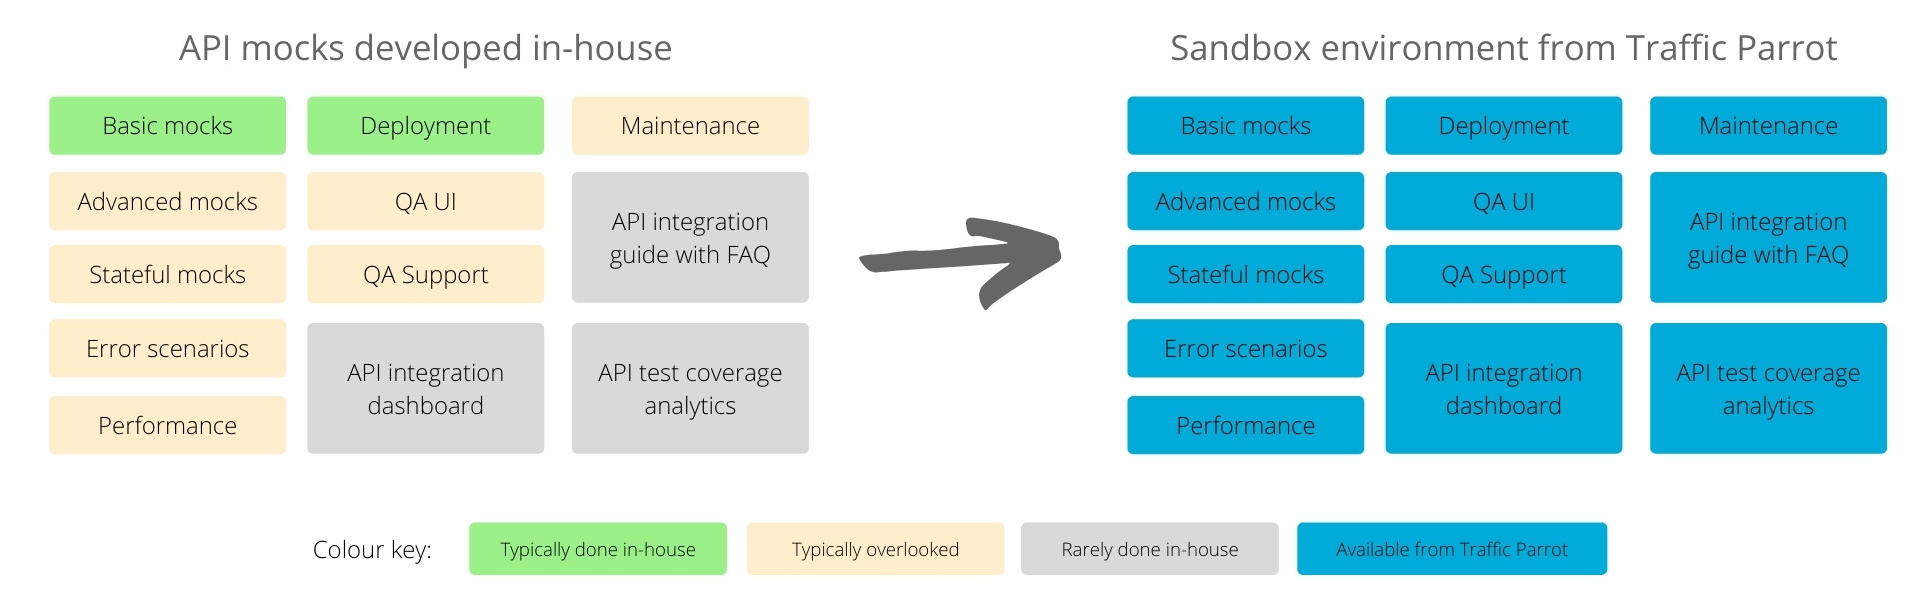
Traffic Parrot offers ready-made API mocks and sandbox environments including for the various APIs offered by FedEx®, including the FedEx® Developer Portal API Catalog.
For architecture diagrams and pricing please review Ready-made FedEx® API mocks, simulators and sandbox environments
This guide provides step-by-step instructions to help us integrate our application code with the FedEx® API.
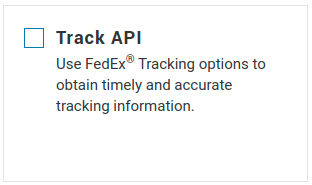
We will use the Track API as a working example. You can use this as a template for any other API that you need to integrate with.
These are the steps we will follow to integrate and test our application code with FedEx®:
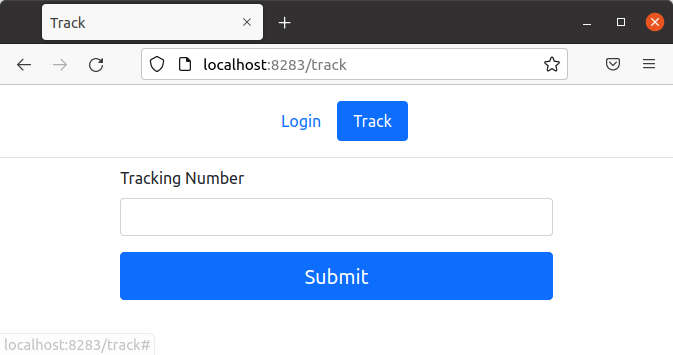
Throughout this guide we will use a sample application that tracks FedEx® deliveries and has a web user interface. We provide both the sources and the executable application.
The first stage of integration is to determine how to meet the business requirements using the features provided by the API.
Our example business is an online retailer who offers FedEx® as a shipping method for their customers.
In this example integration, the business has these key requirements:
The front end team have provided some mock-ups of the tracking UI.
The business analysts have provided a sketch of the tracking message flow.
For the purpose of this sample application, there will also be a login page to supply the API credentials.
In a real application these details would be hidden from the end user.

The official documentation contains API Catalog pages which we can explore to understand how to meet our business requirements using the APIs.
There is also an official API Reference page with further information on data and special values used in the APIs.
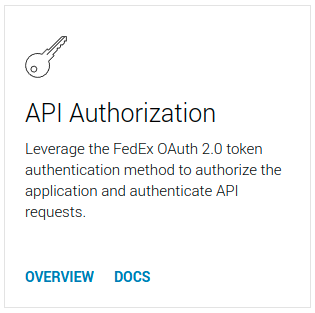
We can see that API Authorization uses OAuth 2.0 bearer tokens as the authorization mechanism for other API endpoint requests. This authorization will be a requirement to use the Track API.
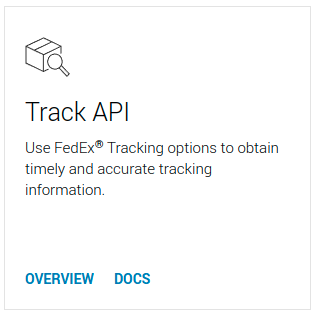
We can see that the Track API has an endpoint that the customer can provide their FedEx® tracking number to and FedEx® will return the most up-to-date tracking information available.
Taking a more detailed look at the API schema and examples, we can identify the key request and response data required to meet the business requirements. Please find a summary below that you can
Details obtained from the API Authorization documentation page.
| Type | Location | Key | Value |
|---|---|---|---|
| Request | HTTP request header | Content-Type | application/x-www-form-urlencoded |
| HTTP request form field | grant_type | client_credentials | |
| client_id | FedEx® customer API Key | ||
| client_secret | FedEx® customer Secret Key | ||
| Success | HTTP response status | Status code | 200 |
| JSON response body | $.access_token | System generated ${access_token} | |
| Error | HTTP response status | Status code | 4xx/5xx |
| JSON response body | $.errors[0].message | Human readable error message |
Details obtained from the Track API documentation page.
| Type | Location | Key | Value |
|---|---|---|---|
| Request | HTTP request header | Authorization | Bearer ${access_token} |
| Content-Type | application/json | ||
| x-locale | Locale to format messages in | ||
| JSON request body | $..trackingNumber | Tracking number to search for | |
| Success | HTTP response status | Status code | 200 |
| JSON response body | $..scanEvents[0].derivedStatus | Tracking status message | |
| $..scanEvents[0].date | Tracking status date and time | ||
| Error | HTTP response status | Status code | 4xx/5xx |
| JSON response body | $.errors[0].message | Human readable error message | |
| JSON response body | $..trackResults[0].error.message | Human readable error message |
To integrate our application with the Track API we will need to follow these steps:
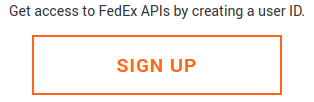
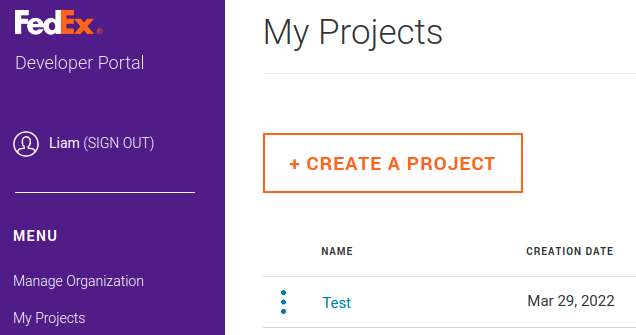
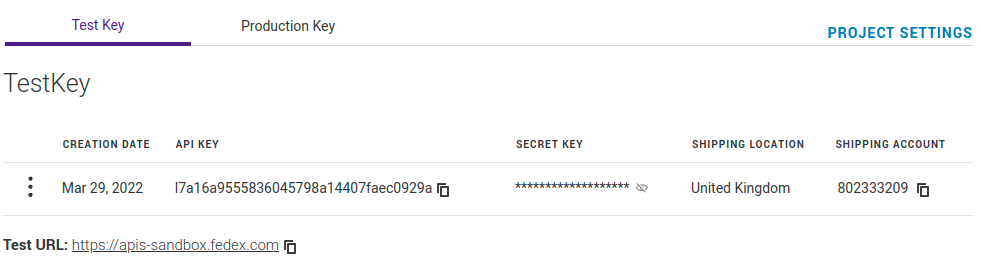
You will need to register to obtain an API key for the test environment.


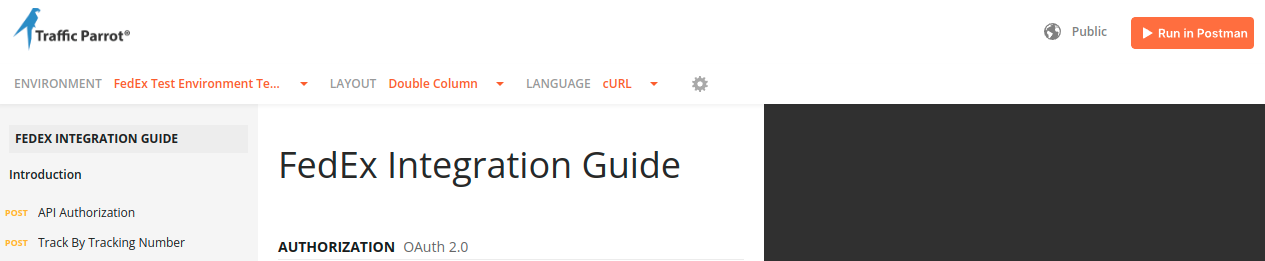
Before we start writing integration code, we can use an HTTP REST API client tool such as Postman to make manual HTTP requests to the API and verify the behaviour we expect.
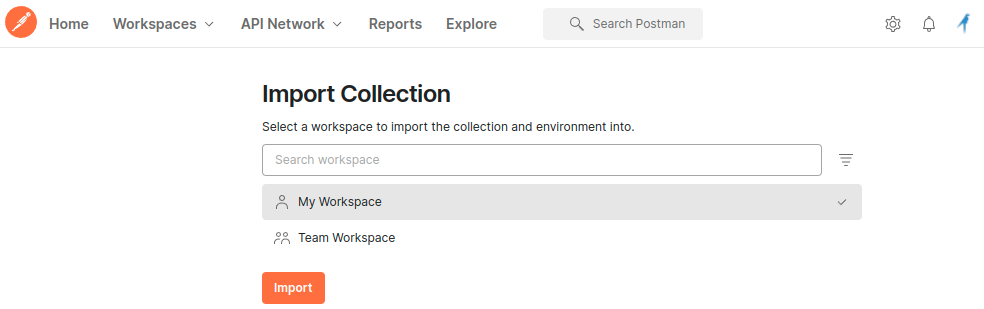
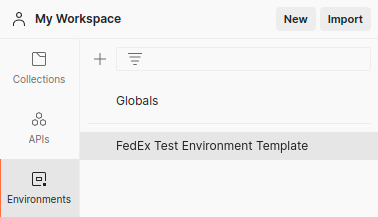
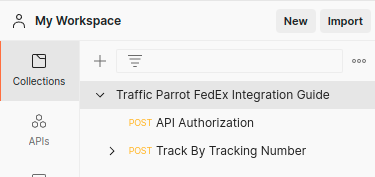
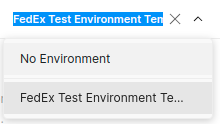
To help you get started, we have a sample Postman collection which you can import into your own workspace.
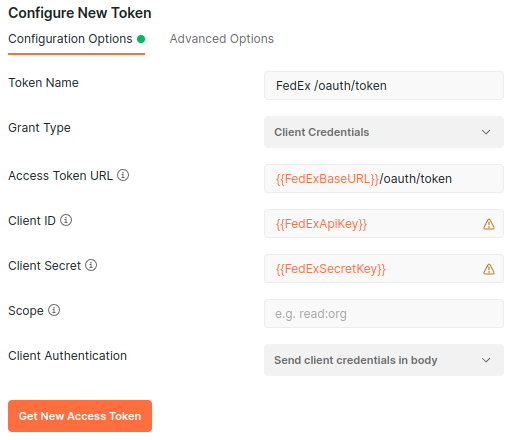
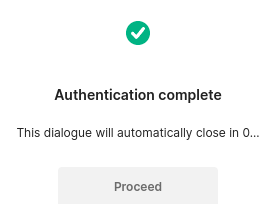
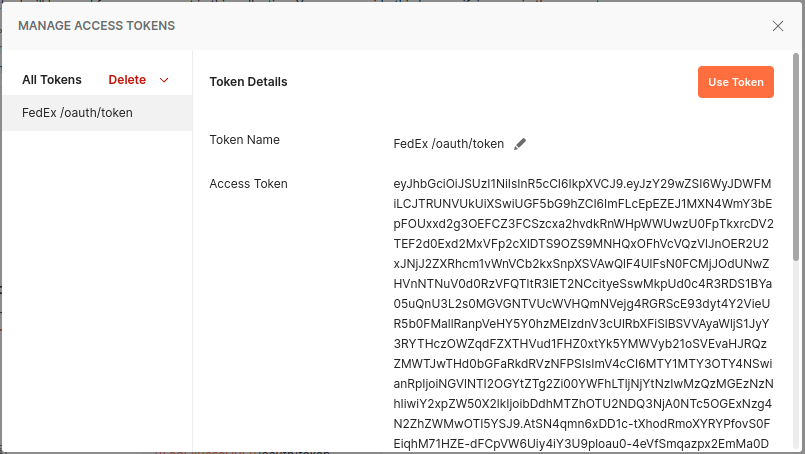
First, we need to verify that we can successfully authenticate with our API Key and Secret Key by submitting an OAuth 2.0 request to https://apis-sandbox.fedex.com/oauth/token as follows.


 under the "Configure New Token" section

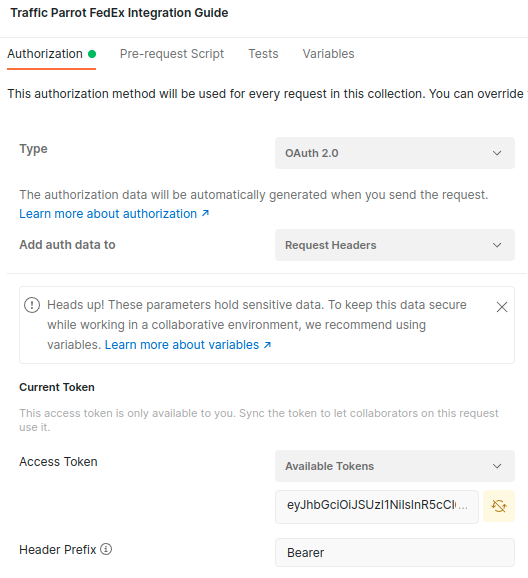
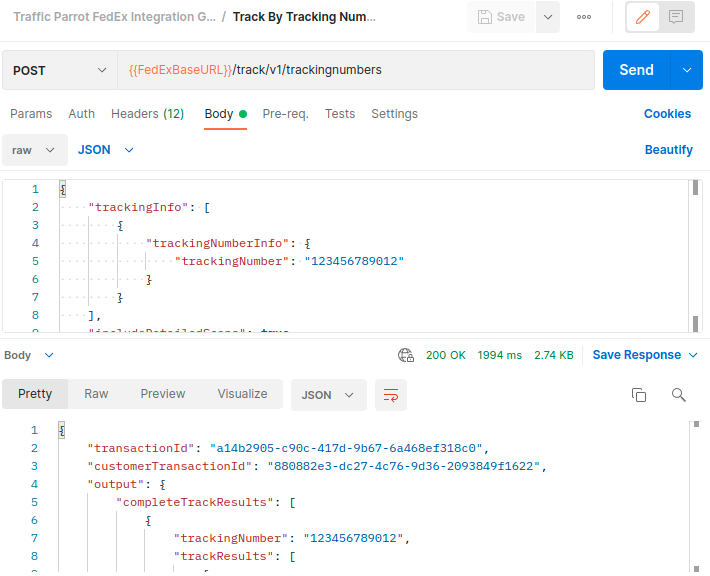
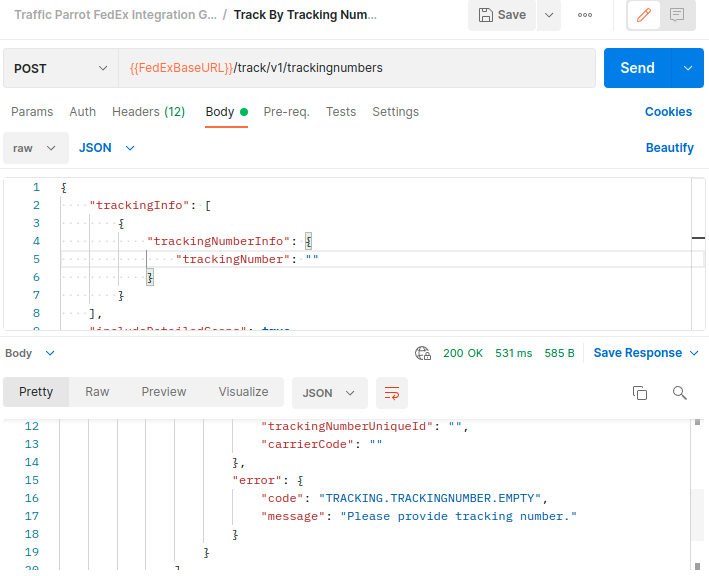
Next, we can verify that we can successfully make a test request to the Track API by submitting a request to https://apis-sandbox.fedex.com/track/v1/trackingnumbers as follows.
 to send a sample request to the FedEx® test sandbox environment
Now we have verified that we can interact with the Track API manually, we are ready to start writing our integration code.
If you encounter issues during development, you can send manual test requests to verify that the issue is not with your own code.
Now we are ready to write API integration code so that our sample application can communicate with the FedEx® Track API.
The Track API documentation contains the API schema, requests, responses and sample code to help us get started.
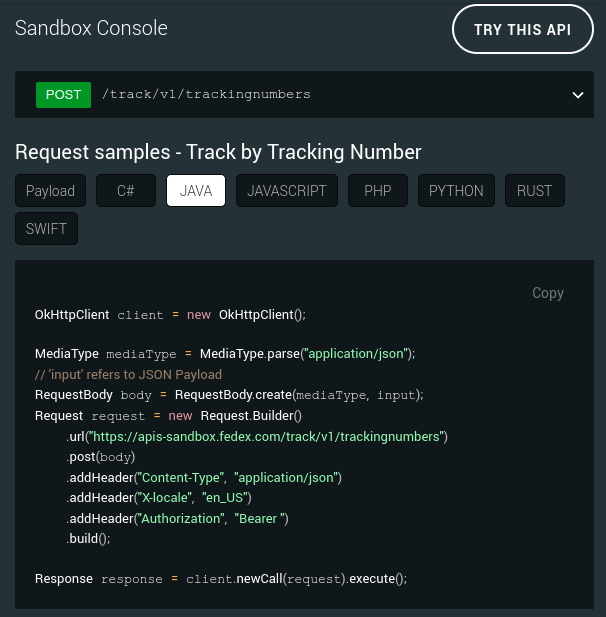
Traffic Parrot sample tracking application code contains an example of how to use the Java code samples to write a real integration with the Track API.
package com.trafficparrot.example.fedex.tracking;

import com.jayway.jsonpath.Configuration;
import com.jayway.jsonpath.DocumentContext;
import com.jayway.jsonpath.JsonPath;
import okhttp3.*;
import okhttp3.logging.HttpLoggingInterceptor;
import org.slf4j.Logger;
import org.slf4j.LoggerFactory;
import org.springframework.beans.factory.annotation.Autowired;
import org.springframework.stereotype.Service;

import static com.jayway.jsonpath.Option.SUPPRESS_EXCEPTIONS;
import static okhttp3.logging.HttpLoggingInterceptor.Level.BODY;
import static org.apache.commons.lang3.StringUtils.isNotBlank;

@Service
public class FedExTrackingService {
    private static final Logger LOGGER = LoggerFactory.getLogger(FedExTrackingService.class);
    private static final String FEDEX_JSON_PATH_FIRST_TRACK_RESULT = "$.output.completeTrackResults[0].trackResults[0]";
    private static final String FEDEX_JSON_PATH_TRACK_MOST_RECENT_SCAN_EVENT = FEDEX_JSON_PATH_FIRST_TRACK_RESULT + ".scanEvents[0]";
    private static final String FEDEX_JSON_PATH_ERROR_MESSAGE = "$.errors[0].message";

    private final FedExApiCredentials fedExApiCredentials;

    @Autowired
    public FedExTrackingService(FedExApiCredentials fedExApiCredentials) {
        this.fedExApiCredentials = fedExApiCredentials;
    }

    public boolean isLoggedIn() {
        return fedExApiCredentials.hasApiCredentials();
    }

    public LogInResponse loginToApi(String apiKey, String secretKey, String apiBaseUrl) {
        try {
            OkHttpClient client = okHttpClient();
            RequestBody body = new FormBody.Builder()
                    .add("grant_type", "client_credentials")
                    .add("client_id", apiKey)
                    .add("client_secret", secretKey)
                    .build();
            Request request = new Request.Builder()
                    .url(apiBaseUrl + "/oauth/token")
                    .post(body)
                    .addHeader("Content-Type", "application/x-www-form-urlencoded")
                    .build();

            Response response = client.newCall(request).execute();
            ResponseBody responseBody = response.body();
            if (responseBody == null) {
                LOGGER.error("Missing response body");
                return logInTechnicalErrorResponse();
            }
            DocumentContext responseJson = parseJson(responseBody.string());
            if (response.code() == 200) {
                String accessToken = responseJson.read("$.access_token");
                fedExApiCredentials.setApiCredentials(apiBaseUrl, accessToken);
                return new LogInResponse(false, "");
            } else {
                String errorMessage = responseJson.read(FEDEX_JSON_PATH_ERROR_MESSAGE);
                return new LogInResponse(true, errorMessage);
            }
        } catch (Exception e) {
            LOGGER.error("Uncaught exception", e);
            return logInTechnicalErrorResponse();
        }
    }

    public TrackingResponse trackByTrackingNumber(String trackingNumber) {
        String requestJson = "{\n" +
                "  \"includeDetailedScans\": true,\n" +
                "  \"trackingInfo\": [\n" +
                "    {\n" +
                "      \"trackingNumberInfo\": {\n" +
                "        \"trackingNumber\": \"" + trackingNumber + "\"\n" +
                "      }\n" +
                "    }\n" +
                "  ]\n" +
                "}";
        try {
            OkHttpClient client = okHttpClient();
            MediaType mediaType = MediaType.parse("application/json");
            RequestBody body = RequestBody.create(mediaType, requestJson);
            Request request = new Request.Builder()
                    .url(fedExApiCredentials.getApiBaseUrl() + "/track/v1/trackingnumbers")
                    .post(body)
                    .addHeader("Content-Type", "application/json")
                    .addHeader("X-locale", "en_US")
                    .addHeader("Authorization", "Bearer " + fedExApiCredentials.getBearerToken())
                    .build();

            Response response = client.newCall(request).execute();
            ResponseBody responseBody = response.body();
            if (responseBody == null) {
                LOGGER.error("Missing response body");
                return trackingTechnicalErrorResponse();
            }
            DocumentContext responseJson = parseJson(responseBody.string());
            if (response.code() == 200) {
                String errorMessage = responseJson.read(FEDEX_JSON_PATH_FIRST_TRACK_RESULT + ".error.message");
                if (isNotBlank(errorMessage)) {
                    return new TrackingResponse(true, errorMessage, "");
                }

                String derivedStatus = responseJson.read(FEDEX_JSON_PATH_TRACK_MOST_RECENT_SCAN_EVENT + ".derivedStatus");
                String date = responseJson.read(FEDEX_JSON_PATH_TRACK_MOST_RECENT_SCAN_EVENT + ".date");
                return new TrackingResponse(false, "", derivedStatus + " at " + date);
            } else {
                String errorMessage = responseJson.read(FEDEX_JSON_PATH_ERROR_MESSAGE);
                return new TrackingResponse(true, errorMessage, "");
            }
        } catch (Exception e) {
            LOGGER.error("Uncaught exception", e);
            return trackingTechnicalErrorResponse();
        }
    }

    private DocumentContext parseJson(String responseBody) {
        return JsonPath.parse(responseBody, Configuration.builder().options(SUPPRESS_EXCEPTIONS).build());
    }

    private TrackingResponse trackingTechnicalErrorResponse() {
        return new TrackingResponse(true, "Technical error, see logs for details", "");
    }

    private LogInResponse logInTechnicalErrorResponse() {
        return new LogInResponse(true, "Technical error, see logs for details");
    }

    private OkHttpClient okHttpClient() {
        return new OkHttpClient.Builder()
                .addInterceptor(new HttpLoggingInterceptor().setLevel(BODY))
                .build();
    }
}This code is used as part of the following code architecture:
You can find the complete sample application on the public Traffic Parrot GitHub repository for more details or to build and run a copy yourself to help you get started with your own integration project.
There are additional points to consider that are beyond the scope of the sample application code. Please find a summary below.
We can employ a variety of different testing techniques that each have pros and cons.
Below you will find details on how to apply five common testing techniques.
| Technique | Repeatable | Automated | Initial Cost | Ongoing Cost | Detects Logical Issues | Detects Integration Issues |
|---|---|---|---|---|---|---|
| Manual exploratory testing | ||||||
| Manual regression testing | ||||||
| Automated unit testing of key business logic | ||||||
| Automated integration testing of API usage | ||||||
| Automated end to end acceptance testing of application |
This is one of the most common testing techniques and simply involves running a copy of your application and testing it manually through the same interface that the end users would use.
The testing cycle typically involves:Much like manual exploratory testing this involves running a copy of your application and testing it manually through the same interface that the end users would use.
The difference is that a pre-defined test plan is followed, to check that expected behaviour has not changed since the last release.
Test plans can be written using a BDD given/when/then approach or as a list of steps to perform and check.
The testing cycle typically involves:Automated unit testing involves taking a subset of your application code and writing automated tests for it in the same language.
Tests are automatically run as part of a CI/CD build every time the code changes.
Here is some sample code that is used to unit test business logic in isolation.
    @Test
    void postTrackSuccessDisplaysStatusOnTrackPage() {
        given(trackingService.isLoggedIn()).willReturn(true);
        given(trackingService.trackByTrackingNumber(TRACKING_NUMBER)).willReturn(new TrackingResponse(false, EXAMPLE_ERROR_MESSAGE, EXAMPLE_STATUS));

        String page = trackingController.postTrack(TRACKING_NUMBER, model);

        then(model).should().addAttribute("status", EXAMPLE_STATUS);
        assertThat(page).isEqualTo("track");
    }

    @Test
    void postTrackErrorDisplaysErrorOnTrackPage() {
        given(trackingService.isLoggedIn()).willReturn(true);
        given(trackingService.trackByTrackingNumber(TRACKING_NUMBER)).willReturn(new TrackingResponse(true, EXAMPLE_ERROR_MESSAGE, ""));

        String page = trackingController.postTrack(TRACKING_NUMBER, model);

        then(model).should().addAttribute("error", EXAMPLE_ERROR_MESSAGE);
        assertThat(page).isEqualTo("track");
    }
Much like automated unit testing this involves taking a subset of your application code and writing automated tests for it in the same language.
The difference is that the area of focus is code that integrates with APIs using hardware resources such as disk or network based APIs, which are
Here is some sample code that is used to unit test API integration in isolation.
    @Test
    void trackSuccess() {
        logInSuccess();

        TrackingResponse trackingResponse = trackingService.trackByTrackingNumber("123456789012");

        assertThat(trackingResponse.isError).isFalse();
        assertThat(trackingResponse.errorMessage).isEmpty();
        assertThat(trackingResponse.latestStatus).matches("Picked up at 2019-08-14T13:33:00-04:00");
    }

    @Test
    void trackFailure() {
        logInSuccess();

        TrackingResponse trackingResponse = trackingService.trackByTrackingNumber("");

        assertThat(trackingResponse.isError).isTrue();
        assertThat(trackingResponse.errorMessage).isEqualTo("Please provide tracking number.");
        assertThat(trackingResponse.latestStatus).isEmpty();
    }

    void logInSuccess() {
        LogInResponse logInResponse = trackingService.loginToApi(FED_EX_API_USER.apiKey, FED_EX_API_USER.secretKey.value, FED_EX_API_USER.baseUrl);

        assertThat(logInResponse.isError).isFalse();
        assertThat(logInResponse.errorMessage).isEmpty();
        assertThat(trackingService.isLoggedIn()).isTrue();
    }
Much like manual regression testing this involves running a copy of your application and testing it through the same interface that the end users would use.
The difference is that the tests are automated instead of manual.
Here is an example report that can be produced using an automated acceptance testing approach.
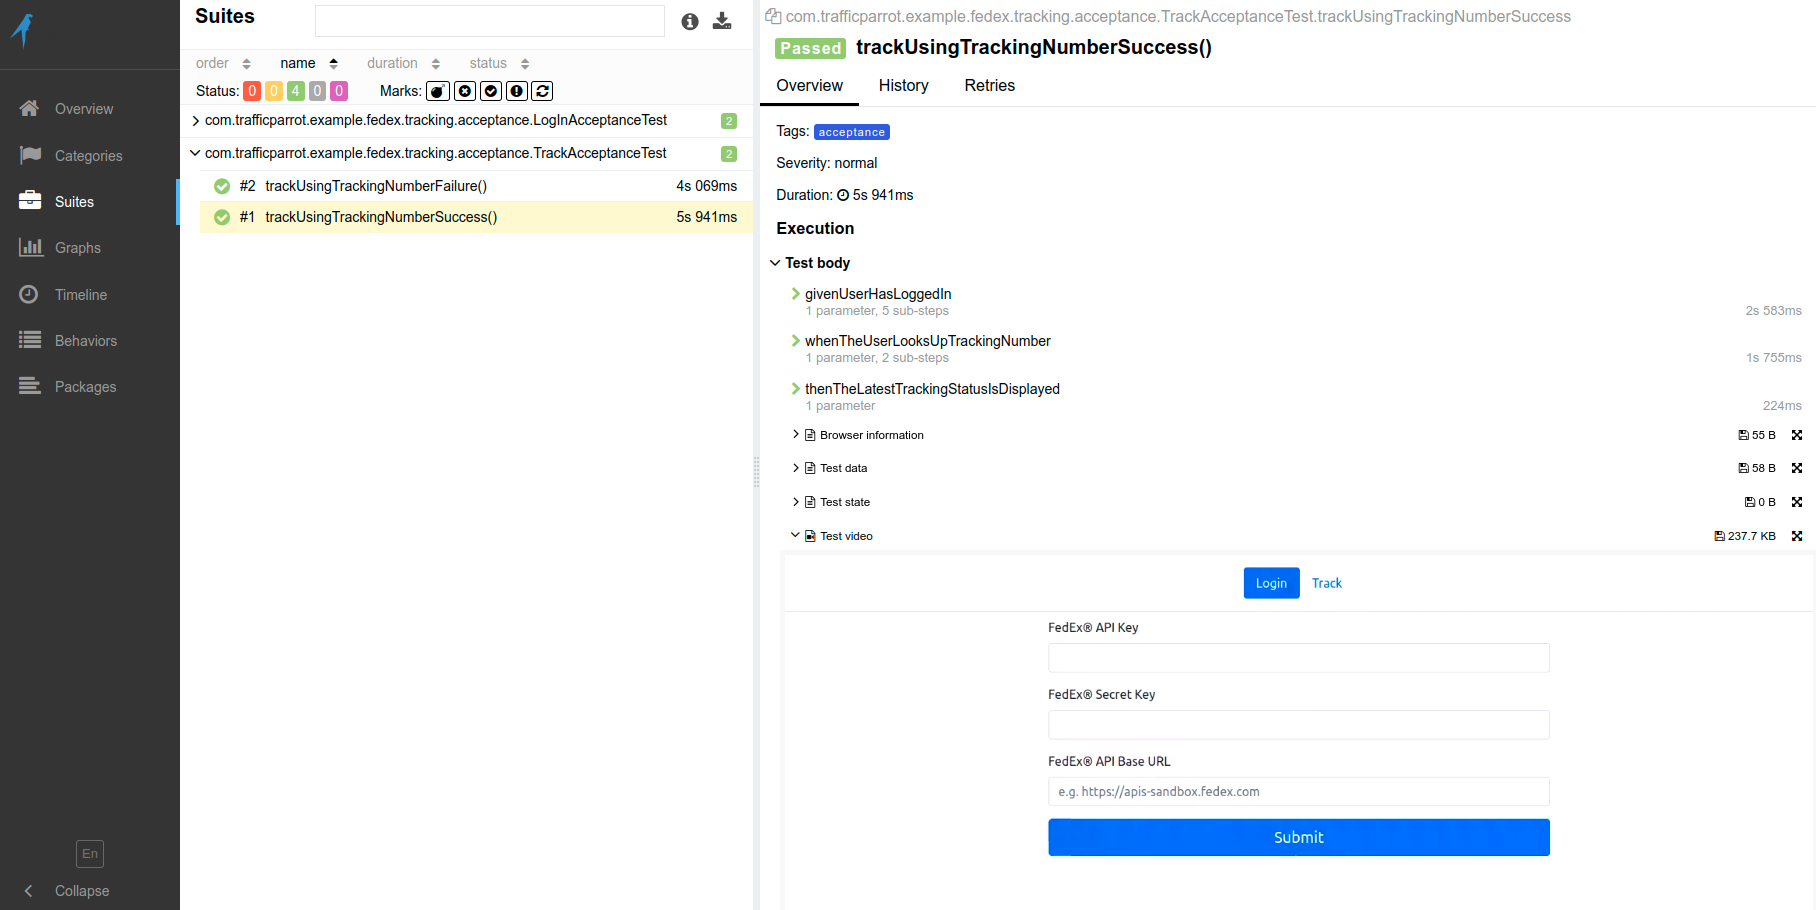
Here is some sample code that is used to automate end to end acceptance testing.
    @Test
    void trackUsingTrackingNumberSuccess() {
        givenUserHasLoggedIn(FED_EX_API_USER);
        whenTheUserLooksUpTrackingNumber("123456789012");
        thenTheLatestTrackingStatusIsDisplayed("Picked up at 2019-08-14T13:33:00-04:00");
    }

    @Test
    void trackUsingTrackingNumberFailure() {
        givenUserHasLoggedIn(FED_EX_API_USER);
        whenTheUserLooksUpTrackingNumber("");
        thenAnErrorMessageIsDisplayed("Please provide tracking number.");
    }
Outside of the test environments, there are additional points to consider when moving to production.
Before being allowed to use the production APIs, FedEx® has an API Certification process to follow for some APIs, follow the steps in the official guide to enable your production API key.
If you need assistance getting your API Certification, Traffic Parrot offers consulting services where we can walk you through any issues you encounter in becoming production ready.
After this, here is a sample release checklist that you can use to help decide if a release is ready to go to production.
In a production environment, it can be critical to watch, understand, inspect and debug the running system to make sure things are working as expected and respond effectively when they are not.
When it comes to monitoring API integrations, the following are important:The FedEx® APIs use semantic versioningto manage API versions.
Each version is represented by the version format of major.minor (e.g. Ship API 1.1).

Here are some of the most common integration issues FedEx® API users face with suggested workarounds or solutions.
HTTP/1.1 503 Service Unavailable
X-API-Mode: Sandbox
Content-Encoding: gzip
Content-Type: application/json;charset=UTF-8
Content-Length: 236
Server: Layer7-API-Gateway
Date: Mon, 18 Apr 2022 13:59:07 GMT
Connection: close
Vary: Accept-Encoding
Server-Timing: cdn-cache; desc=MISS
Server-Timing: edge; dur=105
Server-Timing: origin; dur=6067
Body:{
    "transactionId": "18b5df2b-2786-41f3-83e2-22f1307f2672",
    "errors": [
        {
            "code": "SERVICE.UNAVAILABLE.ERROR",
            "message": "The service is currently unavailable and we are working to resolve the issue. We apologize for any inconvenience. Please check back at a later time."
        }
    ]
}
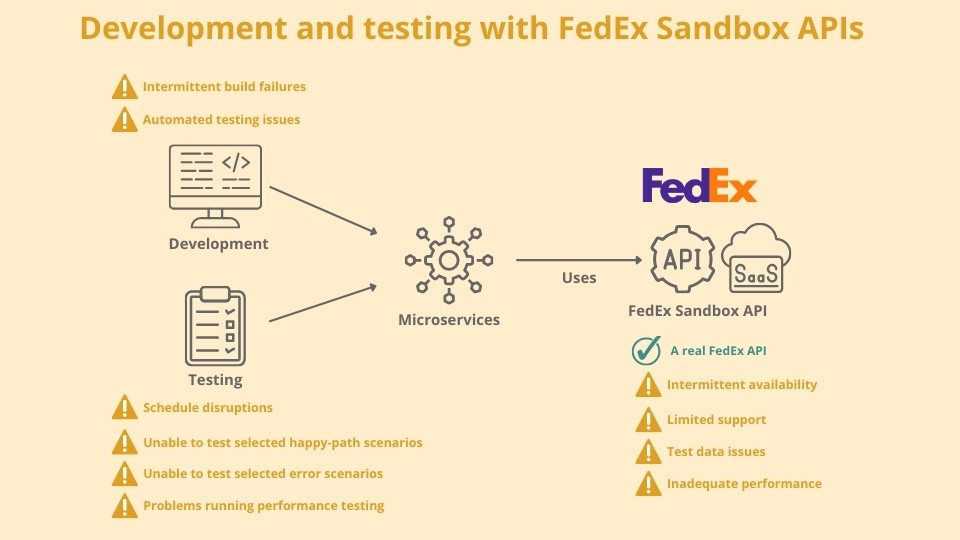
FedEx® sandbox APIs are intermittently unavailable, resulting in error messages that block testing.
Traffic Parrot FedEx® sandbox APIs solve this issue by being highly available for our customers.
HTTP/1.1 200 OK
X-API-Mode: Sandbox
Content-Encoding: gzip
Content-Type: application/json
Content-Length: 301
Server: Layer7-API-Gateway
Date: Tue, 19 Apr 2022 12:29:04 GMT
Connection: keep-alive
Vary: Accept-Encoding
Set-Cookie: JSESSIONID=7A3EB75A8A39D3F4C5231A03786A1EC8; Path=/track/v1; Secure; HttpOnly; Domain=apis-sandbox.fedex.com
Set-Cookie: __VCAP_ID__=e063ffd3-0bf4-41a1-6598-4e4f; Path=/track/v1; HttpOnly; Secure; Domain=apis-sandbox.fedex.com
Server-Timing: cdn-cache; desc=MISS
Server-Timing: edge; dur=93
Server-Timing: origin; dur=197
Body:{
    "transactionId": "a6a9dbff-7d26-477d-bdbd-688645a9585f",
    "customerTransactionId": "22467615-2115-4c0b-b169-fade80e11aec",
    "output": {
        "completeTrackResults": [
            {
                "trackingNumber": "920241085725456",
                "trackResults": [
                    {
                        "trackingNumberInfo": {
                            "trackingNumber": "920241085725456",
                            "trackingNumberUniqueId": "",
                            "carrierCode": ""
                        },
                        "error": {
                            "code": "TRACKING.TRACKINGNUMBER.NOTFOUND",
                            "message": "Tracking number cannot be found. Please correct the tracking number and try again."
                        }
                    }
                ]
            }
        ]
    }
}
FedEx® sandbox API mock tracking numbers are intermittently not found, resulting in error messages that block testing.
Sometimes the issue is genuine and an unsupported tracking number has been provided, which can be fixed by providing a supported tracking number.
Traffic Parrot FedEx® sandbox APIs solve this issue by having predictable, repeatable behaviour for our customers.
HTTP/1.1 200 OK
X-API-Mode: Sandbox
Content-Encoding: gzip
Content-Type: application/json
Content-Length: 262
Server: Layer7-API-Gateway
Date: Tue, 19 Apr 2022 12:31:05 GMT
Connection: keep-alive
Vary: Accept-Encoding
Set-Cookie: JSESSIONID=1CA447C0AC9255093CB82E169C292684; Path=/track/v1; Secure; HttpOnly; Domain=apis-sandbox.fedex.com
Set-Cookie: __VCAP_ID__=f54d4735-4d59-46e2-7967-6877; Path=/track/v1; HttpOnly; Secure; Domain=apis-sandbox.fedex.com
Server-Timing: cdn-cache; desc=MISS
Server-Timing: edge; dur=92
Server-Timing: origin; dur=5235
Body:{
    "transactionId": "1378803b-d312-4014-af90-a7ad734dd4a8",
    "customerTransactionId": "c5dd0962-7c96-436d-8a6b-35dea6c32f08",
    "output": {
        "completeTrackResults": [
            {
                "trackingNumber": "568838414941",
                "trackResults": [
                    {
                        "trackingNumberInfo": {
                            "trackingNumber": "568838414941",
                            "trackingNumberUniqueId": "",
                            "carrierCode": ""
                        },
                        "error": {
                            "code": "SYSTEM.UNAVAILABLE.EXCEPTION",
                            "message": "default.error"
                        }
                    }
                ]
            }
        ]
    }
}
FedEx® sandbox APIs are intermittently unavailable, resulting in error messages that block testing.
Traffic Parrot FedEx® sandbox APIs solve this issue by being highly available for our customers.
Source: Fedex API Rates and Transit Times API + LTL Freight: Account Number Invalid
FedEx Rates and Transit Times API reports error ACCOUNT.NUMBER.INVALID
Use FedEx® production APIs or Traffic Parrot FedEx® sandbox APIs, which do not have this issue.
Source: Rating is temporarily unavailable - Error in FEDEX
FedEx® Rate Web Service reports error Rating is temporarily unavailable, please try again later.
Use FedEx® production APIs or Traffic Parrot FedEx® sandbox APIs, which do not have this issue.
Source: fedex General Failure
When the FedEx® servers are down, you get General failure as the error message.
Use FedEx® production APIs or Traffic Parrot FedEx® sandbox APIs, which do not have this issue.
Source: fedex shipping web service, test account authentication failed
FedEx® API credentials work for some services but not others.
Or use Traffic Parrot FedEx® sandbox APIs, which do not have this issue.
Source: FedEx Shipping Codes
Specific API code values must be used as shipping codes.
Check the FedEx API reference for the valid codes to use.
Source: Unable to obtain courtesy rates in Fed Ex Web Service
FedEx® sandbox APIs are intermittently unavailable, resulting in error messages that block testing such as Unable to obtain courtesy rates.
Traffic Parrot FedEx® sandbox APIs solve this issue by being highly available for our customers.
Source: How to get Fedex testing tracking number?
Which tracking numbers can I use in the test environment?
See the FedEx® API Reference page for information on supported mock tracking numbers.
Or use Traffic Parrot FedEx® sandbox APIs, which contain mock tracking numbers to cover even more scenarios, such as API error cases.
Continue with Chapter 2: How to record and replay HTTP/SOAP requests and responses to learn the record & replay technique that powers HTTP API integration testing, or browse the Traffic Parrot HTTP documentation.